|
Do you want to be a better CNC'er in 37 Seconds? Get Better Tool Life, Surface Finish, and Material Removal Rates Fast. It's that easy. You can install and get results now. |
Comber Rotary Engine Team Build
This is a really cool little engine. I'm building 4 pairs of the small bearing blocks. It's a pretty simple part.
Original Plan for Manual Machining of the Bearing Blocks
Originally I planned to do this engine with manual machining techniques using a special fixture to position the part for production and rounding over the top.

Building a fixture like that would be pretty trivial, especially if you have a DRO. But at some point, I decided to focus all my energies on getting my CNC mill conversion done. It's making me late producing these parts for the team, but once done, I should be able to do them pretty quickly with the CNC.
Plan for CNC'ing the Bearing Blocks
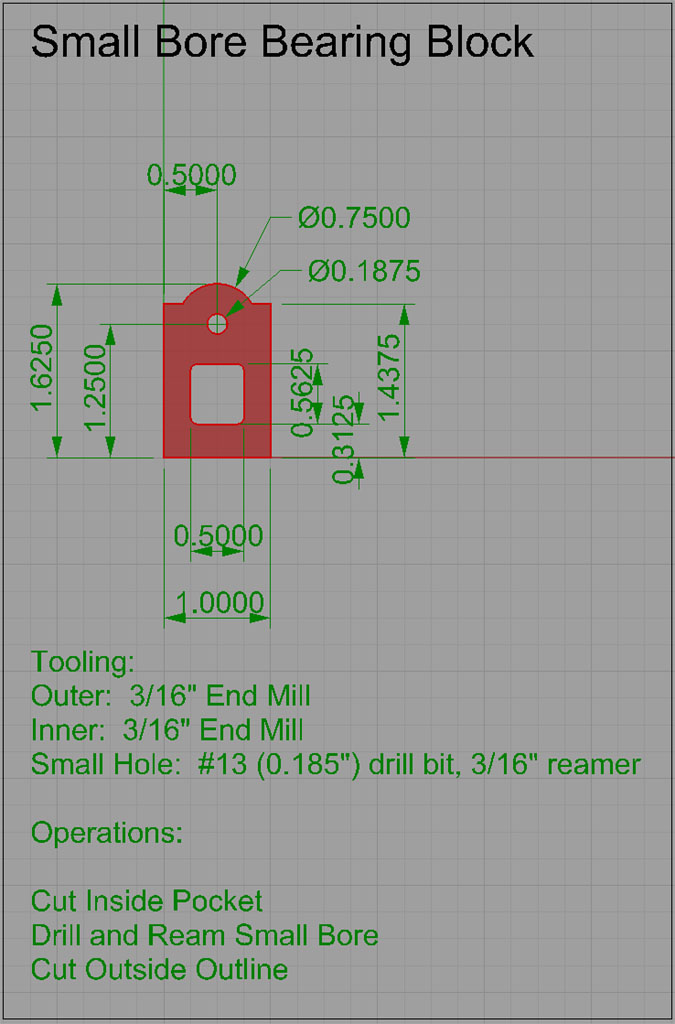
I'll be machining these parts from 1/4" MIC-6 Cast Aluminum Tooling Plate. This is a nice material because the faces of it already have a nice ground finish. That means all we have to do is cut out the edges to make the bearing blocks. Here is a Rhino 3D drawing of the small bearing block with dimensions:

The first question is workholding. I want to keep this pretty simply, so my plan is to use 2 pieces of MIC-6 glued back to back with LocTite. I will clamp the edges and stick the stacked plates into my milling vise. I glue the two together in order to hold the parts so they don't walk around once the outside edge is cut that separates the part from the plate while it's being held in the vise. To further facilitate the workholding, I will drill the bearing hole all the way through both plates before cutting the outline, and insert a through bolt to provide additional holding power before cutting the outside profile.
So, the machining operations will go something like this:
1. Cut the inside pocket. This is the squarish window. I'll use a 3/16" 2 flute end mill for this operation. My CAM program has several options, and my plan is to spiral into the center of the window, and to take the pocket down 0.050" per pass until I've cut it down to 0.270". That should amply clear the 0.250" thick first plate. The first pass will be a roughing pass that will leave 0.010" of material in place. When I've cut the profile all the way down to the bottom, I will finish up with a finishing pass that just cuts the entire 0.270" high part 0.010" deep with the edge of the end mill. I will specify climb milling for this operation because it leaves the nicest finish.
2. Drill the hole with a #13 drill bit. That's a tad smaller than the final 3/16" dimension of the hole. This hole should run all the way through both plates, so it will be to a depth of 0.700".
3. Ream the hole with a 3/16" reamer. I'll go ahead and ream all the way through both plates, so a depth of 0.700" here too.
4. Insert a through bolt in the hole to help hold the part in place. To avoid marring the surface, I'll use a little piece of soda can aluminum between the bolt head and the workpiece.
5. Cut the outside profile with a 3/16" 2 flute end mill. I will again be cutting this in a series of passes, 0.050" deep, until I get down to a depth of 0.270". I'll leave an allowance of 0.010" for a final finish pass with the full edge of the endmill. I will specify climb milling for this operation because it leaves the nicest finish.
As I'm milling, I'll be watching carefully and alternately using a little blast from my air nozzle to clear chips, and an occassional shot of WD-40 to keep things lubricated so the aluminum doesn't stick to my end mill.
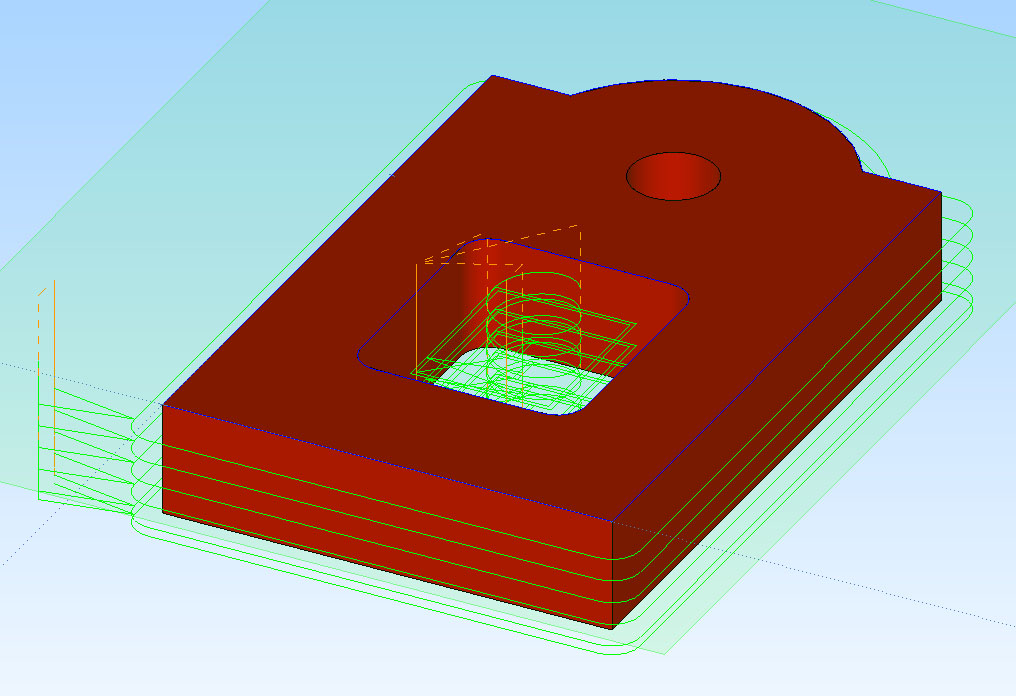
I used my CAM program, OneCNC, to generate the g-codes. Here is what the part looks like with the toolpaths plotted in OneCNC:

The green lines are the path the tool will follow...
G-Codes
Here are the g-code files for the bearings:
SmallBearingInsidePocket: This code will cut the rectangular window inside the bearing with a 3/16" end mill.
SmallBearingHole: This is a peck drilling cycle for the hole.
SmallBearingOutsideProfile: This code will cut the outline of the bearing with a 1/8" end mill.
Part 0, 0 is the lower left corner in each case. Z = 0 is the top of the bearing.
Making Chips
Start with 2 pieces of 1/4" MIC-6 Cast Tool and Jig plate. They're glued together with LocTite and clamped on the ends...
Now we have to figure out where the end of the tool is and set the CNC Z-axis DRO accordingly. That toolsetter is at 0 when the tool's tip is exactly 2.000" from whatever the setter is sitting on. So we set the Z-axis DRO to 2.000". To set the X and Y axis DRO's, I jog the tool down to where I want the lower left corner of the part to be. No great accuracy needed on X and Y at this time...
Here I've finished cutting the inside pocket and I'm now starting to cut the profile for the outside. This particular run did not use a finish pass...
There is the part. I just need to knock it loose from the LocTite. You can see a little bit of the blue LockTite down in the inside pocket. Looks like a boo-boo on the left!
I started a second part and wanted to try something. I cut the inner pocket. Screwed up my position. How do I realign? I'm using an edge finder to locate X and Y by touching off the pocket's sides. Worked great!

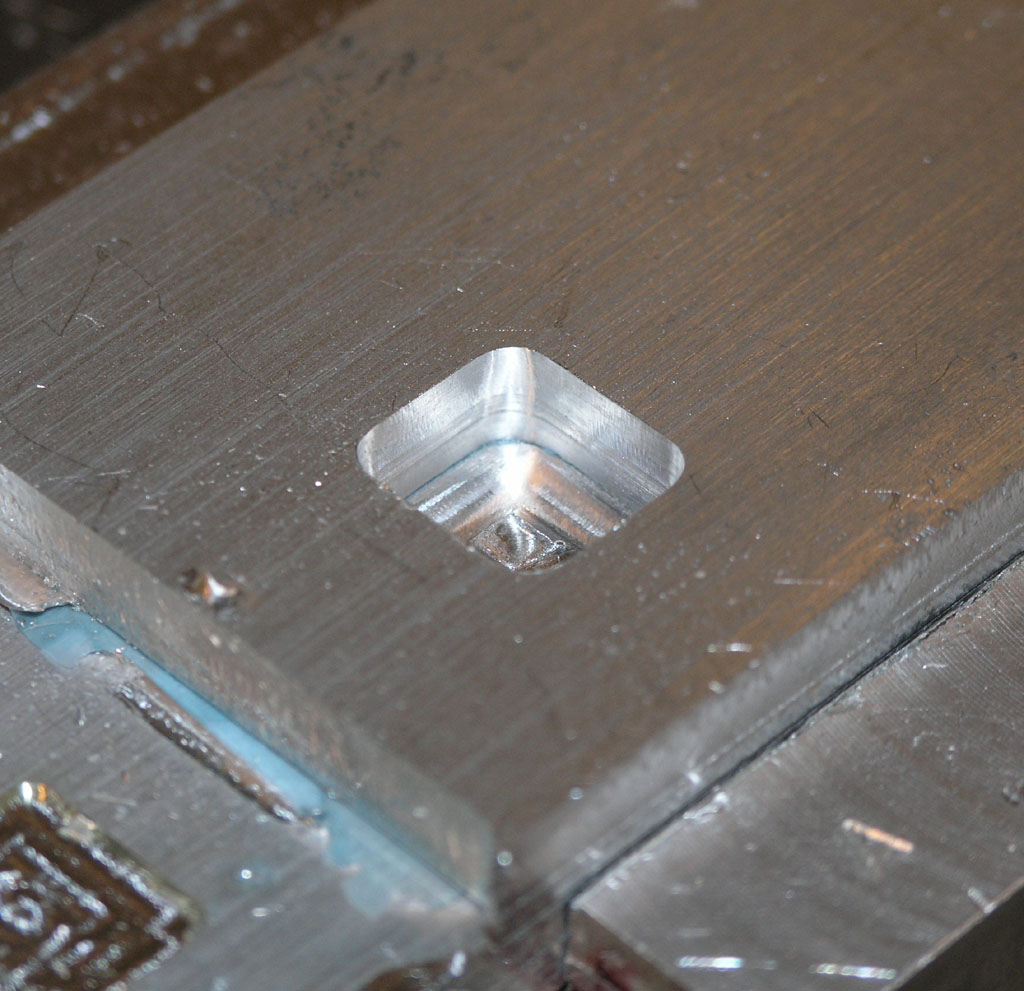
Here is a closeup of the pocket. This is like 4X magnification so you can get some idea of the surface finish. It looks pretty good to me!
Here is a view of a couple of proto-parts. They're not final. The one on the left had a finishing pass of 0.010". You can see a definite improvement in surface finish. This photo is about 3X magnification. I want to try one with an 0.005" finish pass to see if it looks better.
At this point I measured the dimensions on the lefthand part and was annoyed to find it was off by several thousandths on most of the dimensions. I carefully rechecked the calibration of my mill (Mach3 let's you set steps/inch). That wasn't the problem. Eventually, it occured to me to measure the diameter of the 3/16" end mill with a micrometer. It measured 0.1837", which is quite a ways off the advertised 0.1875"! I'll have to run a new g-code program that accounts for that difference and see how the part tolerances look then.
|
Do you want to be a better CNC'er in 37 Seconds? Get Better Tool Life, Surface Finish, and Material Removal Rates Fast. It's that easy. You can install and get results now.
|
||||||||||||||||||
| ||||||||||||||||||