4 Awesome DIY CNC Machines
You Can Build Today
Introduction
So you want to build a CNC machine, but you're not quite sure what kind of machine to build? Then this article is for you. We'll try to create a framework you can use to decide what your first CNC project should be.
The first thing you'll want to do is make some notes about some of the questions you'll want to understand up front. Try this questionaire:
Cost: How much can you afford to spend on your CNC machine? Some are more expensive than others. Some will require more software or tooling than others, which adds additional expense. Get a real honest assesment of the level of cost you're willing to deal with for the project.
Difficulty: Close behind cost will be a realistic assessment of the skills you can bring to the table in building your machine. Some machines will be much easier to build than others. Some will be happier with tolerances that are a little looser and easier to achieve. Strong woodworking versus strong metalworking skills will affect your choices too.
Time: Given enough time, you can manage to build almost anything. But how much time can you realistically devote to the project? How much of your interest revolves around creating the machine itself versus using the machine after it is done? Consider that it may be a good idea to go all the way through getting a simpler machine working before graduating to your ultimate CNC project. You will have learned a lot on the simpler machine and you'll be that much more ready to tackle a complex machine.
Projects: What do you want to make with your CNC machine? This will greatly affect the type of machine you build as well as the required specifications for that machine.
Let's run down the machine types that are available and comment a little on how they fit with the various questions I asked you to consider. I'm going to tackle them in rough order of cost and complexity.
But first, if you already have a machine, please take our Hobby Machine Survey so you can see the results of what kinds of machines other hobbyists have.
1. DIY CNC Router
CNC Routers are the CNC machines of choice for woodworkers, and they make an amazing addition to any woodworking shop. A typical DIY CNC Router has fairly loose tolerances compared to a milling machine or lathe, but is capable of much tighter tolerances than most other woodworking. For example, fine inlay work becomes possible.
DIY CNC Routers can be fabricated from materials ranging from particle board to all-metal construction with precision rails that results in a professional quality machine. There are many plan sets and kits available as well as companies that specialize in selling parts to make a CNC Router.
CNC Router Kit: Shapeoko
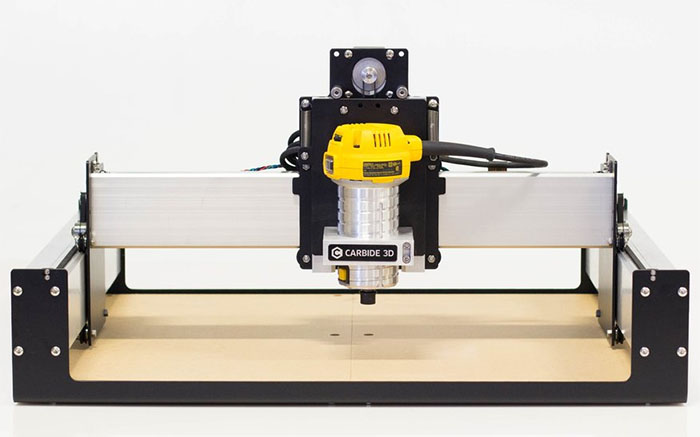
Easy-to-build kit: Carbide3D Shapeoko...
I have to hand it to the Carbide3D people--the Shapeoko is one sweet DIY CNC Router kit.
This potent little CNC Woodworking Machine sailed through two years of our CNC Router Surveys with ultra-high customer satisfaction ratings. If that wasn't good enough they absolutely killed MAKE Magazine's 2017 Desktop Fabrication review:
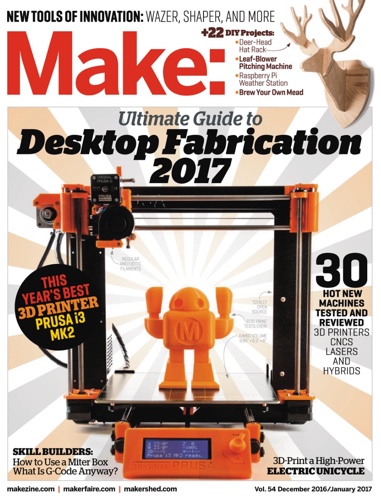
This is what Make: Magazine had to say about the Shapeoko XXL in their 2017 Digital Fabrication Shootout:
“This benchtop powerhouse illustrates why you go big or go home.”
“The XXL is simply a tremendous value for the capability and usable cutting area.”
When I was ready to get a CNC Router into CNCCookbook's workshop, I knew I wanted a few things:
- It had to be DIY. I wanted to write about it and video the step-by-step build.
- It had to be powerful. I've been at CNC for too long to play with toys that ultimately can't accomplish much. Sure, this is not a full-sized machine, but I don't have room for a full-sized CNC Router in my shop.
- It had to be budget and time friendly. 'Cause you know why that is!
The glowing reviews I'd read from our surveys, the Make review, and the many chances I've had to meet and chat with the Carbide3D people made my choice for CNCCookbook a no-brainer.
We got a Shapeoko XXL in and I documented the build!
More DIY CNC Routers
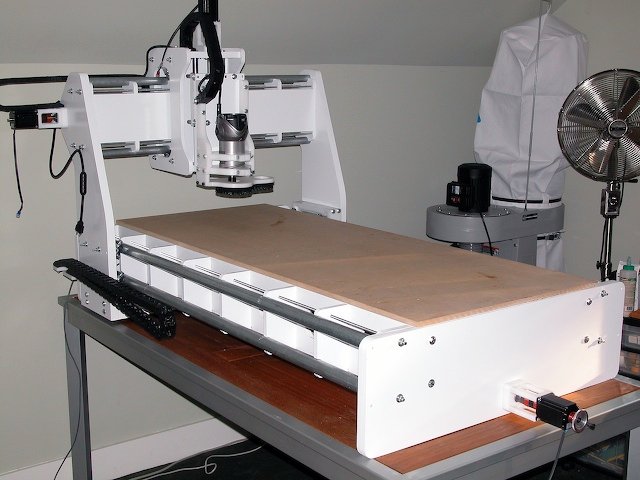
Here is a Joe's CNC Router, which is largely made from wood...
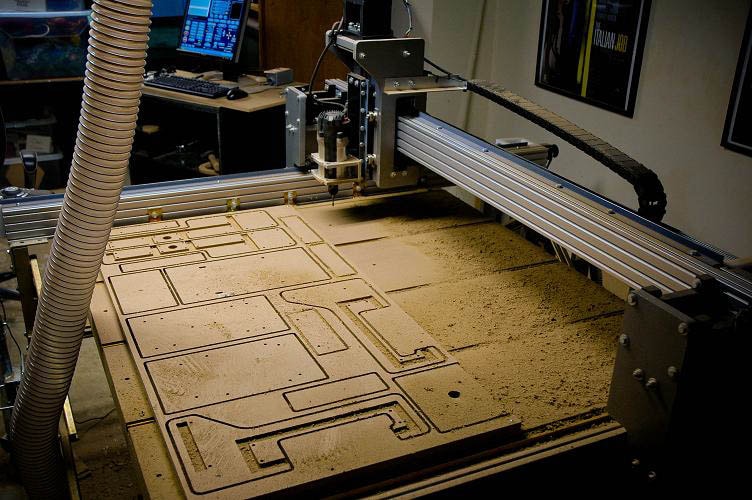
Another Joe's CNC machine is a hybrid of MDF and aluminum extrusions...
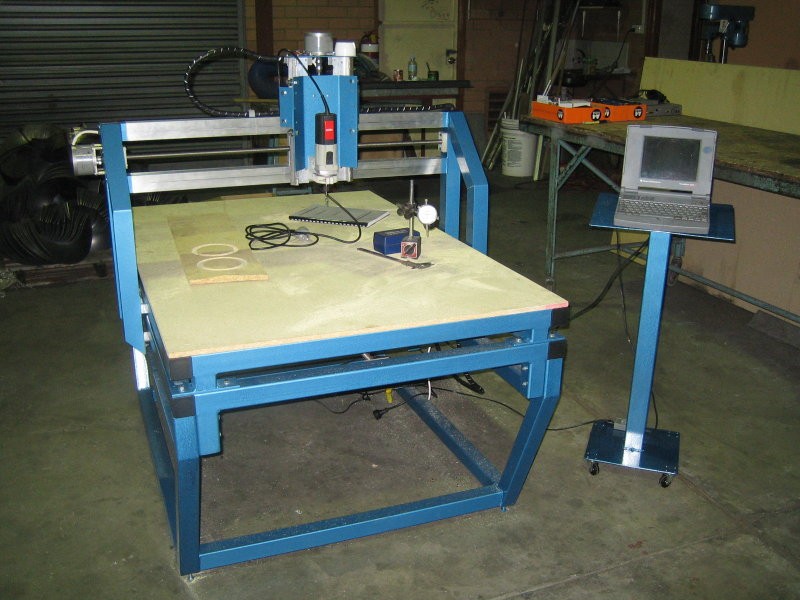
Nice DIY CNC Router built as a college project...
The sky is the limit on DIY CNC Router projects. Use of professional quality linear rails, rigid construction, and a high quality spindle can produce results similar to commercial tables costing a whole lot more.
Sample DIY CNC Router Projects
A typical CNC Router Table will have relatively limited Z-travels, so it will be more for parts cut from sheet materials like a plasma table. With that said, the CNC Router is capable of quite a bit more diverse parts than a plasma table. Here are some samples:
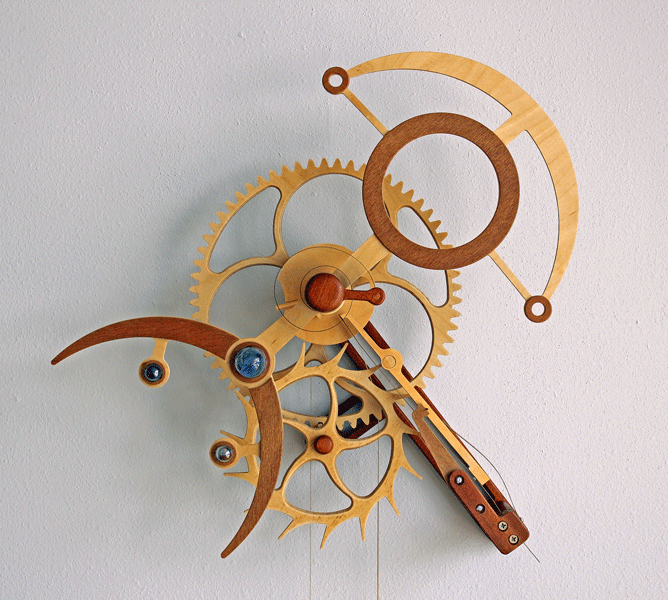
Wood geared clocks are beautiful CNC Router projects...
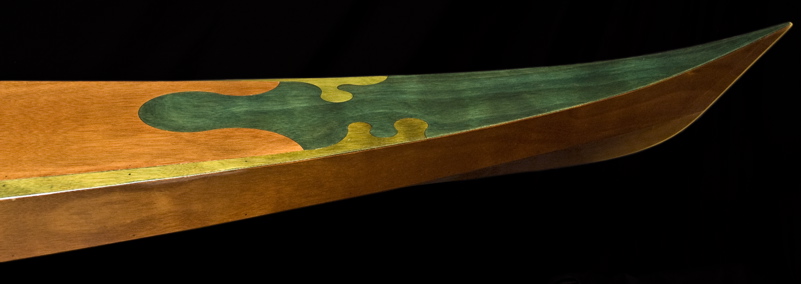
Arbitrary shapes can be made with a CNC Router making for artistic joinery on this wooden kayak...
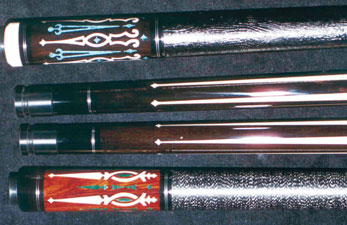
Pool cues can be inlaid with a CNC Router 4th Axis capability...

Nautilus door's iris mechanism is brass...
I've shown some fairly elaborate projects here to give a sense of the tremendous potential having your own CNC Machine can bring. Much simpler projects are also easy to do. Here's a racing sign made of inlaid Corian on a Joe's CNC Router:
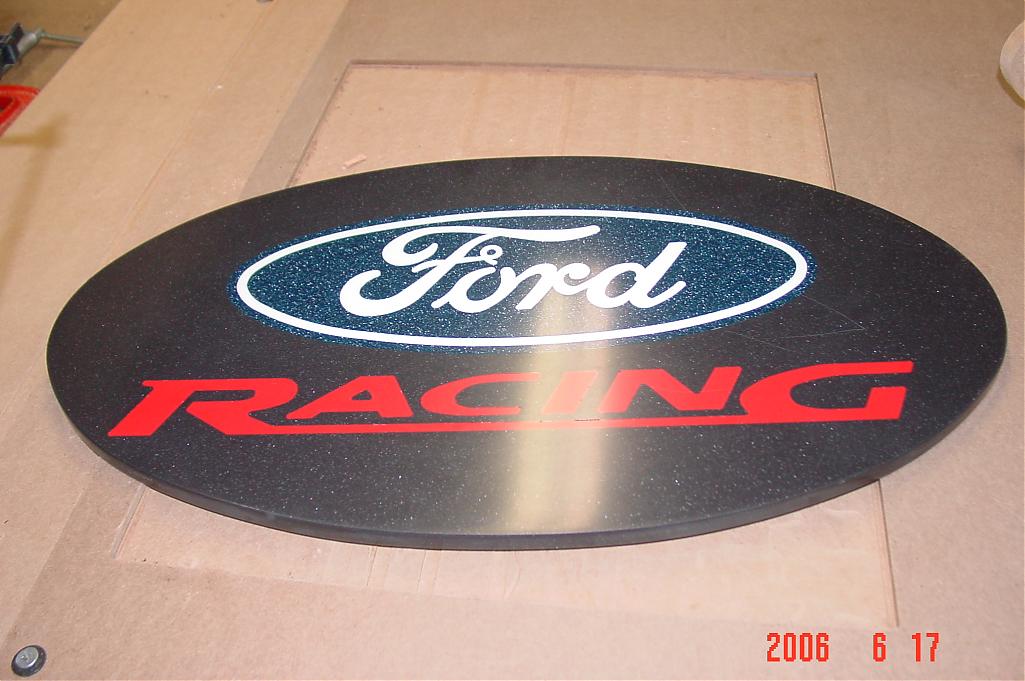
To me that's amazing work done on a relatively modest machine.
CNC Router Profile
DIY CNC Router |
| Cost |
Medium: The table needs to be a little more accurate than a plasma cutter. If you want to cut aluminum and other soft metals, you'll need a fair bit of rigidity. And there are 3 axes as well as a spindle (often just a handheld router in a bracket) to consider. Another factor driving increased cost is you will need to purchase CAM software of some type to get full benefit from a CNC Router. |
| Difficulty |
Medium (Scratch Built) to Easy (Kit). These machines will be more work than a plasma table. Consider one to be equivalent to a fairly in-depth woodworking project. However, you can save a lot of time and effort at very little additional cost by trying a DIY CNC Router kit like the Shapeoko. |
| Time |
Short to Long. This is a bigger project than a plasma table and will take longer to complete. You can offset that by buying parts kits and plans. A kit can be done pretty quickly. |
| Disadvantages |
These machines are aimed at wood, plastic, and if you have a well-made rigid machine, soft metals like aluminum. A big one takes a fair amount of room in your shop, but on the otherhand, you could live without some of your other wood working machines in all likelihood if you had one. |
| Projects |
Almost anything you'd like to make from wood, plastics, or if the table is up to it, soft metal. |
2. 3D Printer
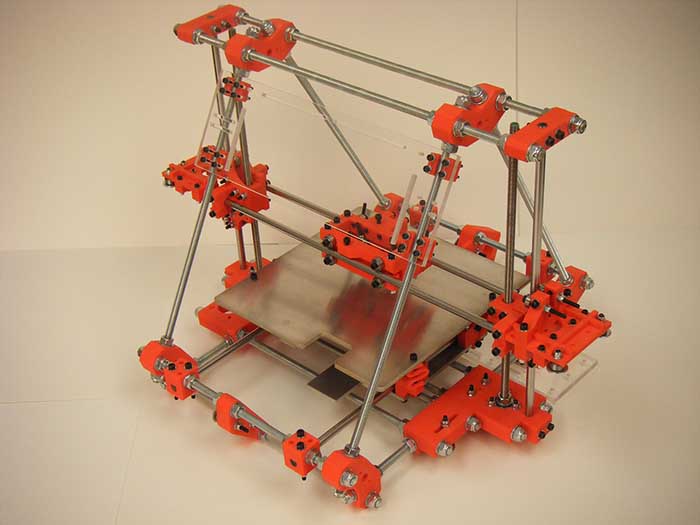
In all likelihood, the simplest and most inexpensive machine to get started with is a 3D Printer. They may look like tinker toy creations, especially the DIY 3D Printers, but they're capable of surprisingly sophisticated work. We did a multi-part series that gives a great introduction to 3D printing that will tell you a lot about them. We also did a complete series on building a Rostock Max v2 3D Printer.
3D Printers do what's called Additive Machining, because they add material rather than cutting it away. There are some distinct advantages to additive machining in that you can make parts that would be extremely difficult to make with subtractive or conventional machining. For example, you could create a whistle like the one shown below and extrude the little ball inside the whistle as part of the process. Hollow parts are easy, and it is important to take advantage of that to reduce your use of the plastic resins when making parts.
Most 3D printers use plastic filament extrusion technology. They build the parts up layer by layer. This approach is cheap and cheerful, but has the disadvantage that parts can be relatively low resolution. Here is a typical extruded part:
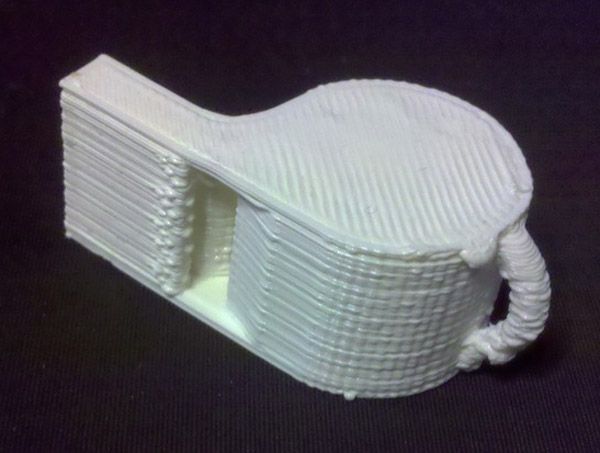
The whistle works, but there are extrusion lines you'll have to either accept or sand off after finishing the part...
Now here is the same part made with a high resolution optical process:
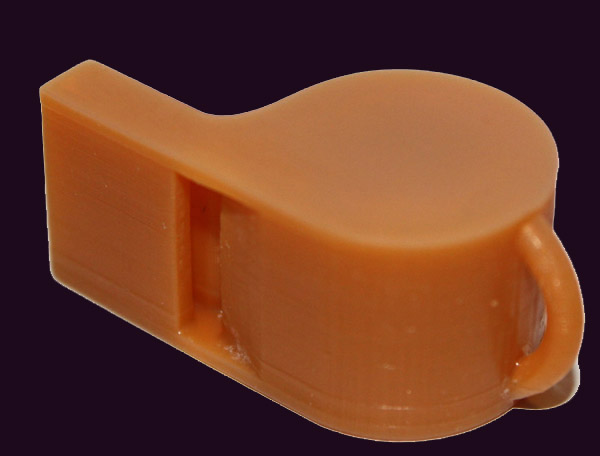
What a difference: the part is smooth and holds much tighter tolerances...
Sample 3D Printer Parts
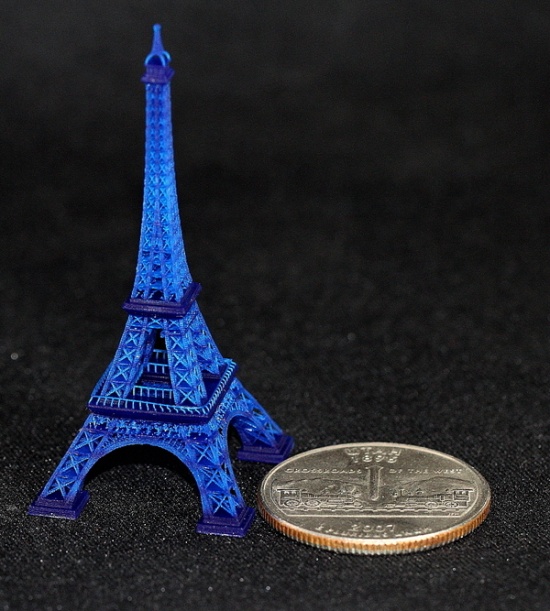
Eiffel tower printed with a high resolution 3D printer...
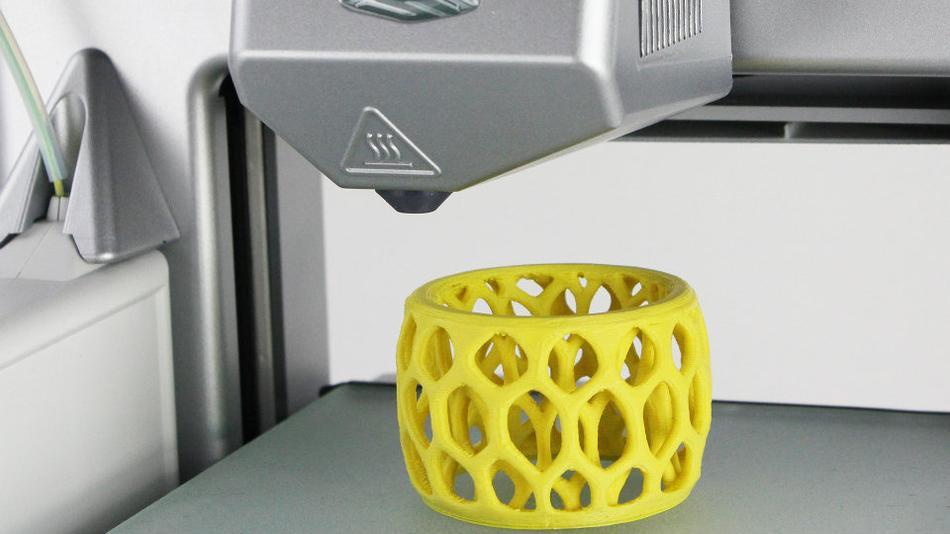
Extrusion-based part...
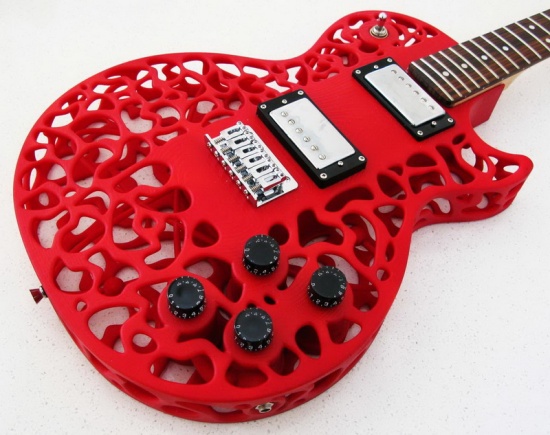
3D Printed Electric Guitar Body...

3D Printed Cascading Planter System...
3D Printer Profile
DIY 3D Printer |
| Cost |
Low: You can buy a finished 3D printer for under $2000 and if you're careful you could probably build one for under $1000. The software required to run one is available as free open source. A high resolution 3D printer can be done for somewhere in the $2000 to $3000 range using a DLP projector as the light source. But, light sensitive resins can be fairly expensive. |
| Difficulty |
Low. These machines have fairly easy tolerances and you can purchase parts kits that simplify the process further. A good kit is almost snap together. |
| Time |
Low |
| Disadvantages |
Plastic only. Low resolution for extruders. Making a part can take hours. Plastics can be expensive. |
| Projects |
Anything you'd like to make in plastic. Your major limitation will be the resolution of the printer and the overall size of parts you can make in one. Some models accomodate much larger sizes and there are high resolution 3D printers that use light sensitive resins that can deliver much tighter tolerances than the extrusion-based printers. |
3. CNC Milling Machine
Depending on how many corners you cut with the CNC Router, and how elaborate your CNC Mill project is, a CNC Mill is probably the most expensive, hardest to do, but most flexible DIY CNC Machine. While there have been some scratch-built CNC Milling machines done, you're best off converting a manual milling machine to CNC until you have a lot of CNC experience under your belt. Therefore, one of the first decisions you'll have to make, and one that will determine a lot of other decisions for you down the line, is which manual milling machine to convert.
There are a lot of possibilities. Some to consider in order of heaviest/most expensive to lightest/cheapest include:
- Bridgeport-style Knee Mill: These are expensive, and the heavy knee is not especially well suited to CNC. OTOH, there are a lot of CNC'd knee mills out there and nothing says, "Milling Machine" like a Bridgeport. I wouldn't choose one if I wanted to set out to do CNC form the start, but if you already have one, there's no need to consider anything else.
- RF-45 and Clones: These are Chinese-made Bed Mills that are available from all sorts of places and in all sorts of variations. They have a work envelope and rigidity similar to a Bridgeport, but without the heavy knee, so they're better suited to CNC projects. Their biggest disadvantage is their spindle, which is limited to 1600 rpm. Plan on doing a belt drive conversion at some point before you'll realize the full potential of one of these mills.
- Grizzly G0704: These mills are a little smaller than an RF-45, but they are an ideal CNC platform. Folks like Hoss at Hossmachine can provide full details of everything you need to know, plans, and often kits to help with conversions. If the table and travels are big enough for your projects, this will be a cheaper and faster project than an RF-45.
- Sieg X2: These are neat little machines and very popular. I don't think I'd go any smaller than the X2, but you can do some amazing things with one as Hossmachine has demonstrated (full automatic tool changer and VMC style enclosure).
An important note:
Some beginners start thinking about converting a drill press to a milling machine. Don't even get started going down that path. It will require so much effort to produce a mediocre result that it just isn't worth it.
Here are some typical machines:
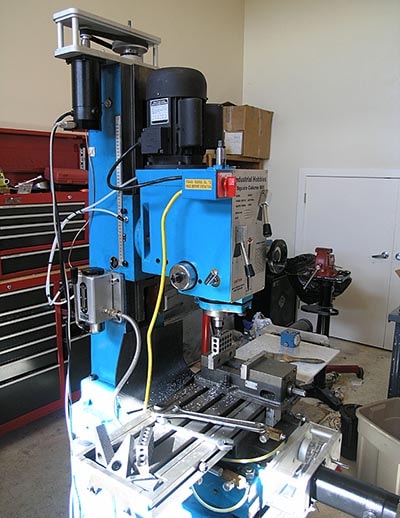
My RF-45 Conversion...
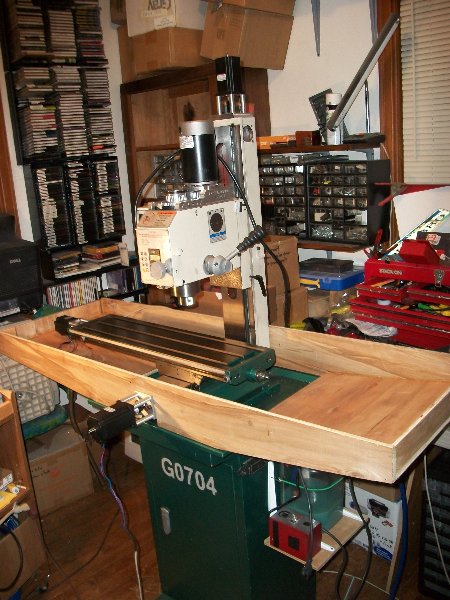
Hoss's G0704 CNC Conversion at a fairly early stage: he added a lot more!
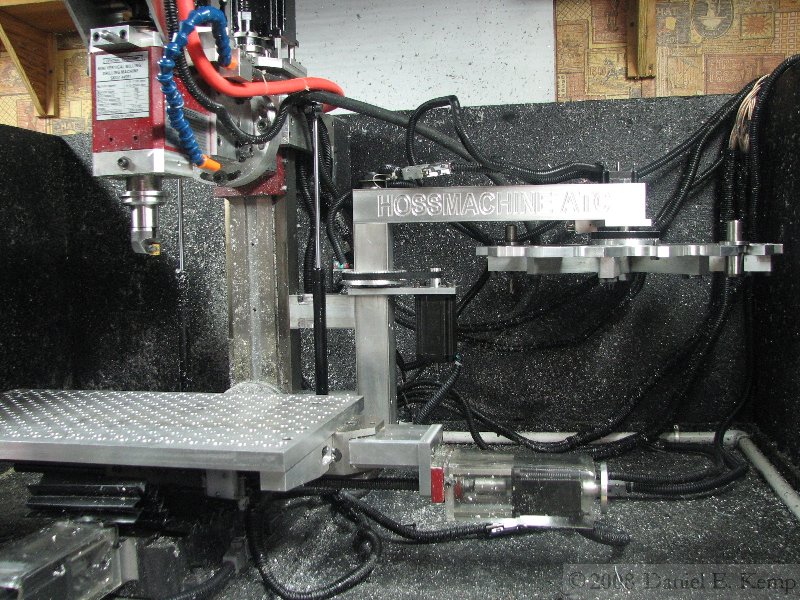
The sky is the limit. Here is Hoss's Sieg X2 with Automatic Tool Changer and Full Flood Enclosure...
With a CNC Milling Machine in your shop, the sky really is the limit. Best of all is that the machine can be used to make even more tooling. Once you get the basic 3 axis working you can create powered drawbars, automatic tool changers, and all sorts of other accessories.
Sample CNC Milling Machine Parts
I keep a page of interesting parts made in home shops with CNC. Here are some highlights for DIY CNC Milling Machines:
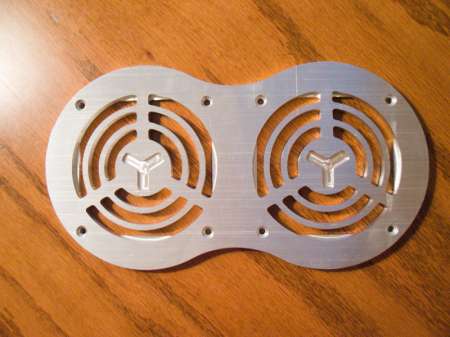
Fancy custom fan cover for a PC case...
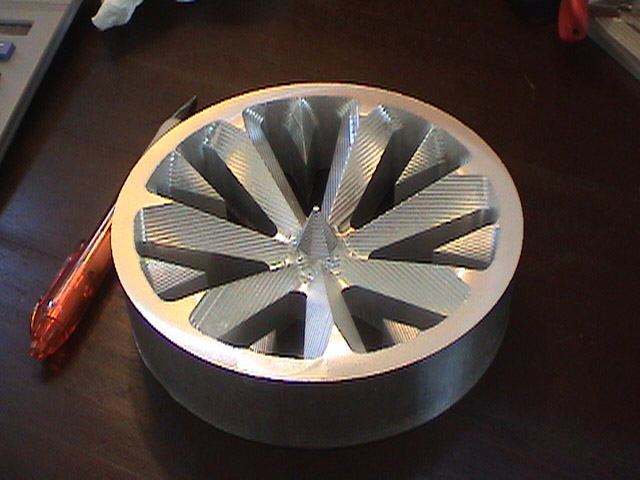
Custom mag wheels for a kid's wagon to match dad's car...
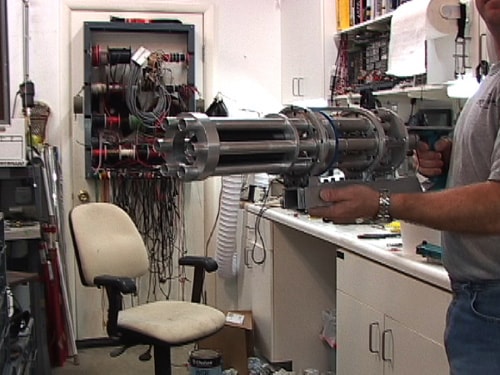
Paintball minigun...

Custom car badges...
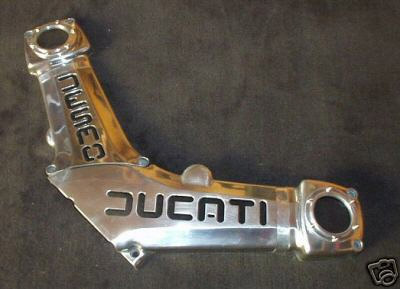
Ducati belt drive cover...
CNC Mill Profile
DIY CNC Milling Machine |
| Cost |
Medium to High: This project is best tackled as a conversion of a manual milling machine to CNC. As such, you'll have the cost of the manual machine as well as all the additional CNC parts. Another factor driving increased cost is you will need to purchase CAM software of some type to get full benefit from a CNC Mill. |
| Difficulty |
Medium to High. While you could tackle a project like this if you've never done any machine work before, it is easier if you have a bit of manual machining under your belt. |
| Time |
Medium to Long. You can offset that by buying parts kits and plans. |
| Disadvantages |
Largely the expense and complexity. |
| Projects |
Almost anything you'd like to make from any machinable material. Your only real limitation is likely to be the capacity of your machine's travels to deal with the size of your parts. |
4. CNC Plasma Table
Next up in complexity would be a DIY CNC Plasma Table. These tables move a plasma torch around to cut shapes out of sheet metal. CNCCookbook has a gallery of DIY plasma table ideas that show many of the projects others have done. Here is a nicely finished plasma table:
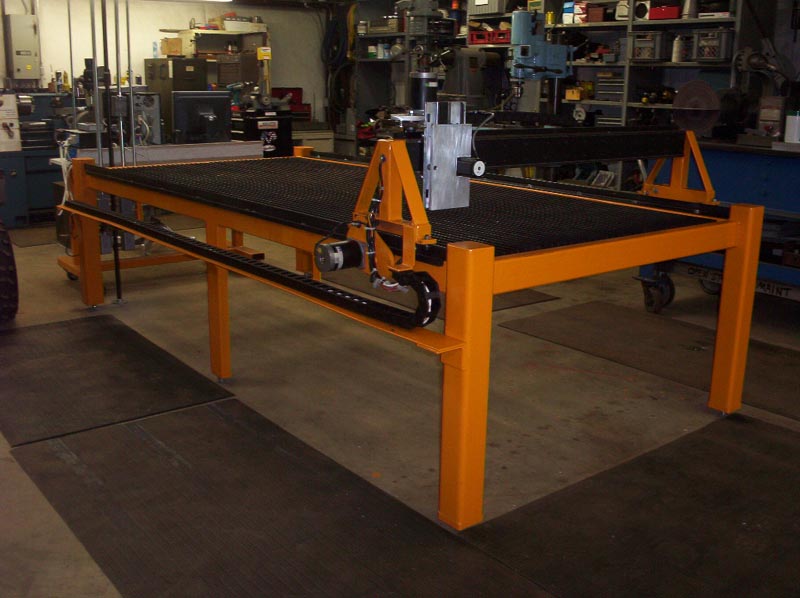
A nicely finished plasma table...
Basically, you need an XY table with some ability to control Z height. The table doesn't need particularly tight tolerances, but it is helpful if it can move fairly fast. The mechanisms involved can be pretty simple:
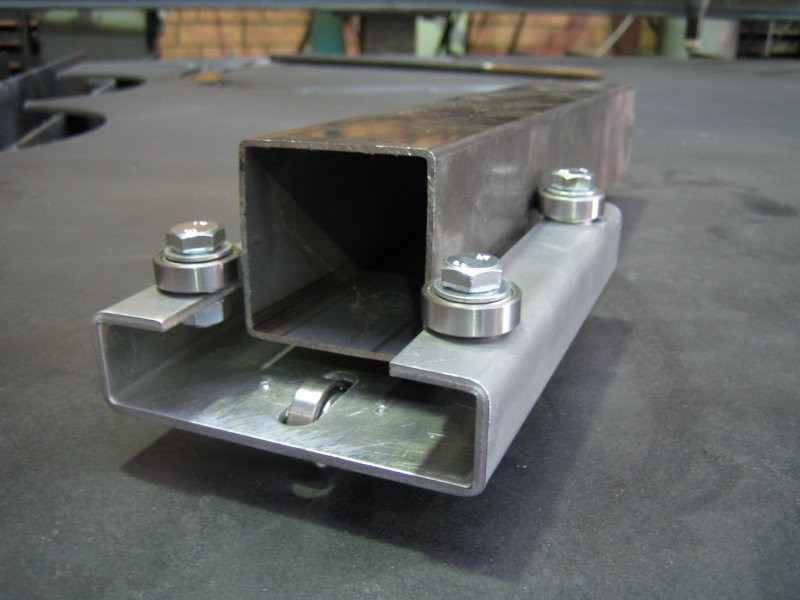
Skate bearing slide mechanism
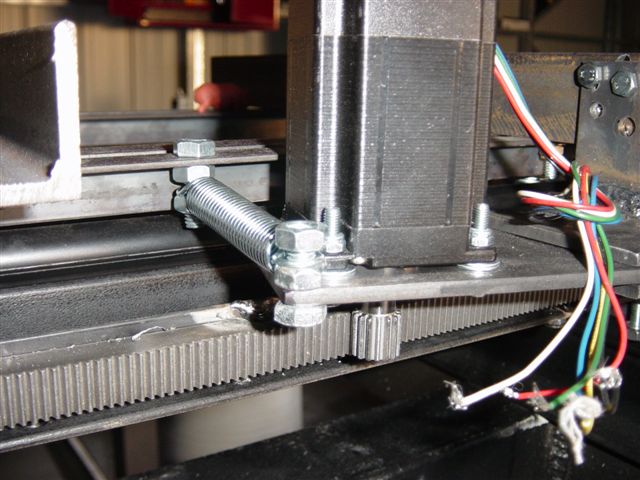
Spring tensioned rack and pinion to reduce backlash...
Rack and pinion and skate bearing slide mechanisms have fairly sloppy tolerances, but they're fine for plasma cutting and they're cheap and easy to build. If you're a welder and have done some fabrication and perhaps a little sheet metal work, you'll find a plasma table to be a pretty straightforward project.
Sample Plasma Table Parts
Plasma tables are designed to cut parts from sheet stock:

This parts tumbler is made entirely from plasma cut parts...
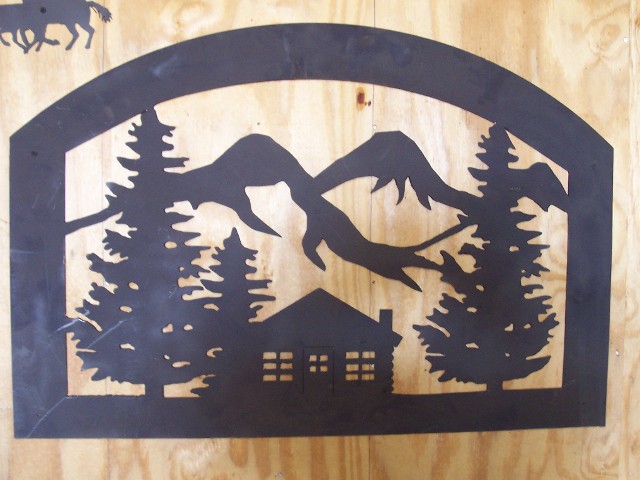
Plasma cutters are great for making signs and other flat artwork...

If you're clever, the art doesn't have to be flat...
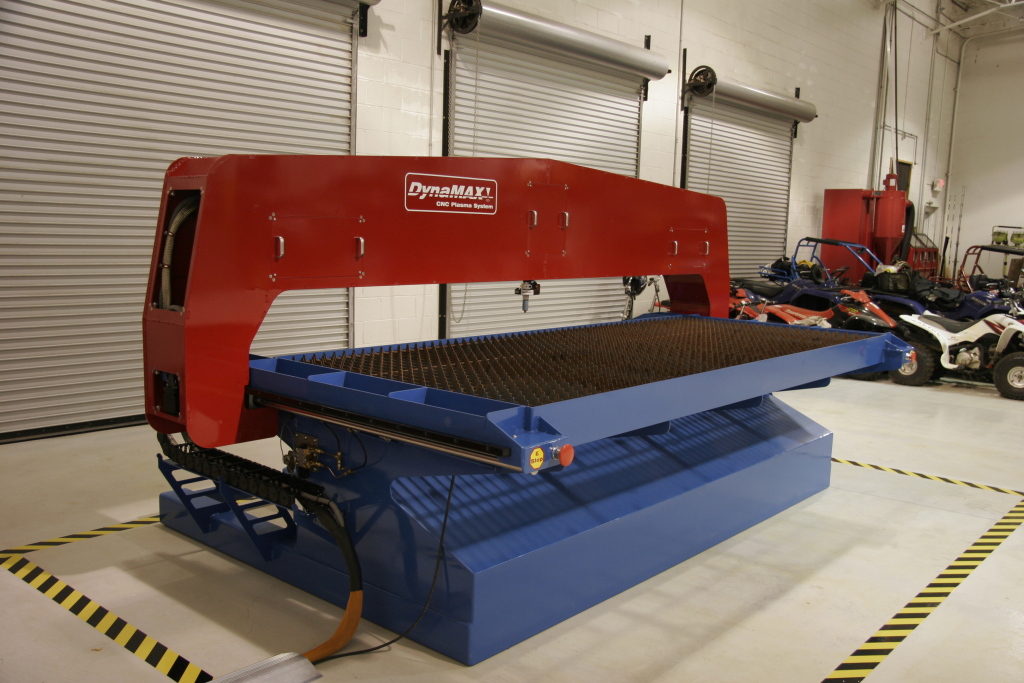
This large plasma table uses plasma cut parts that are welded together using tab and slot construction...
Plasma Table Profile
DIY Plasma Table |
| Cost |
Low to Medium: The table itself can be relatively cheap--just some steel stock. You'll need 3 stepper or servo motors, some kind of rail system (can be fabricated cheaply), and a rack and pinion drive which is also pretty cheap. The expense is in the plasma cutter, unless you already own one. Relatively simple software can be used since you will be cutting the exact outline of the DXF drawing. |
| Difficulty |
Low. These machines have fairly easy tolerances. If you've done welding and fabrication projects, you can tackle a plasma table. |
| Time |
Medium. This is a bigger project than a 3D printer. |
| Disadvantages |
Sheet material only. Relatively low resolution and parts will need cleanup to remove slag and smooth edges. The process can harden materials, making plasma cutting less desirable than water jet if the part will need to be machined after being plasma cut. |
| Projects |
Anything you'd like to make from sheet metal. A standard plasma table size is 4 feet by 8 feet, which allows for quite large projects to be tackled. |


Check out the G-Wizard Machinist's Calculator...