|
|
|
|
|
|
|
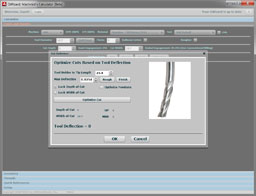
Do you want to be a better CNC'er in 37 Seconds? Get Better Tool Life, Surface Finish, and Material Removal Rates Fast. It's that easy. You can install and get results now. |
Driver Enclosure and Swingarm Rack
The PC is covered elsewhere, as are the details of the electronics for the driver components. This page lays out the mounting of the electronics in the driver enclosure, as well as the swinarm rack that holds the two enclosures as well as a touch panel LCD and keyboard on a swingarm.
Swingarm and Rack

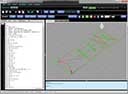
Almost finished, here's what it will look like!
Gecko Drive Heatsink Mounts
I used a piece of extruded aluminum heatsink material from eBay to create a tray for the Geckos and their fuses:
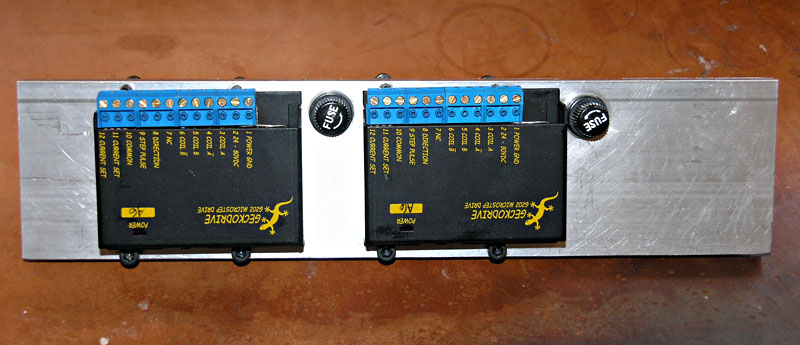

A little light milling machine work was all it took. I need to decide whether to mount the tray vertically, which will save space, or flat on spacers. I'll have to see how the chassis lays out when I get the remaining components together.
GRex and Power Supply Enclosure
For enclosures I have a couple of standard rack mount chassis. One will contain the PC, the other will hold the GRex and the DC power supply for the stepper motors. I'll also stick any relays I need in there. The power supply components are mounted on a sub-plate, which is then bolted to the 19" rack mount enclosure:
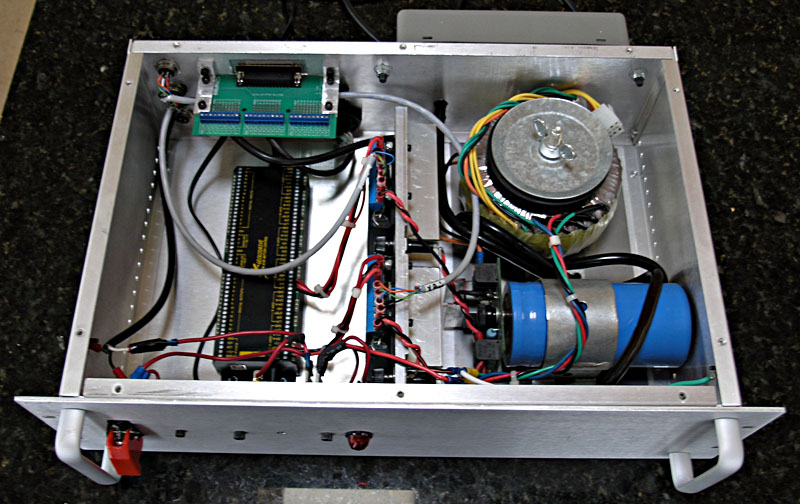
GRex, Gecko Drives, and DC Stepper Power Supply Mounted in Enclosure...
Box Connections
AC Power
X-Axis Stepper: Using a 6 pin microphone connector
Z-Axis Stepper: Using a 6 pin microphone connector
Limit Switches: Using a 6 pin microphone connector
Control Panel: Using a Parallel Port Connector
Spindle Control: Undecided
Switched Power Strip: For Spindle Power and other accessories

Rear panel Connections ...

Back panel connectors installed. Step/Dir and DC power connected to the Gecko drives. 3 microphone connectors for 2 step motors and the limit switches. Parallel breakout card for the control panel...

Front Panel...
Label Your Cables!
As part of the process of building my enclosures, I have to take apart the working step motor driver enclosure. I want to drill the rear panel for every concievable connection I made need in the future so that once I have it bolted back together, adding a new feature will not require any chassis modification, it simply requires running the wiring to the GRex. Towards that end, I bought some cable marking products from CableOrganizer.com to make it easier to keep up with the wiring:

Label machine and the two cable marker dispensers. Middle one has labels you can write on, lefthand one has digits...

Here are the step motor cables. I labeled the axes on each cable. The numbers tell me which terminal number on the Gecko drive the lead goes to.
Motor & Coolant Box
In a later phase, I'm planning to mount the motor speed control and coolant control relays in their own box. Connections from the driver electronics box will be as follows:
- 2 coolant relay connections: Will be handled by a 6 conductor microphone connector just like what I'm using for limits and step motors.
- Spindle control connections: Will be handled by a 6 conductor microphone connector just like what I'm using for limits and step motors. Connections will include:
- Spindle speed: An analog out from the GRex
- Spindle on/off
- Spindle direction
- Ground
- Switched AC. I will install a switched AC outlet strip on the back of the driver enclosure. It will be connected into the E-Stop circuit so power to spindle, coolant, and anything else plugged in there is cut when E-Stop is hit.
|
Do you want to be a better CNC'er in 37 Seconds? Get Better Tool Life, Surface Finish, and Material Removal Rates Fast. It's that easy. You can install and get results now.

|
||||||||||||||||||
| ||||||||||||||||||