|
Do you want to be a better CNC'er in 37 Seconds? Get Better Tool Life, Surface Finish, and Material Removal Rates Fast. It's that easy. You can install and get results now. |
|
Laser Level Tricks: Measuring the Flatness of a Plate to 0.0001" |
I saw this on the Home Shop Machinist board and promptly had to capture it for posterity. The method is simple and highly accurate, making use of a laser level in an ingenious way.
| Setup and Reference Test on a Surface Plate |
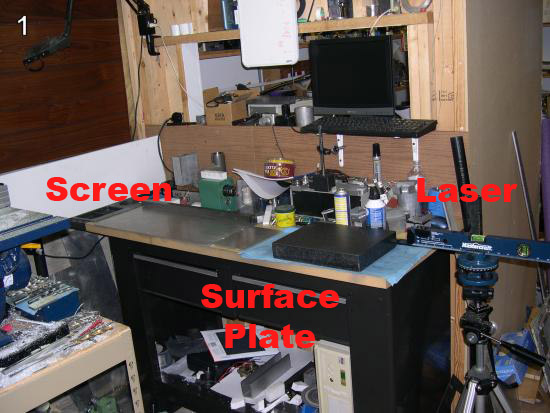
Setup to measure flatness...
You'll need some sort of screen to project on, a place to put the object you are measuring, and a laser level. In this case, we will start by measuring the flatness of the surface plate. The laser level needs to be setup to project a line onto the object. You need to be able to adjust the angle of incidence of the laser to the object, as well as its height, and its parallelness to the surface. If the line is not parallel to the surface, the result looks like this:
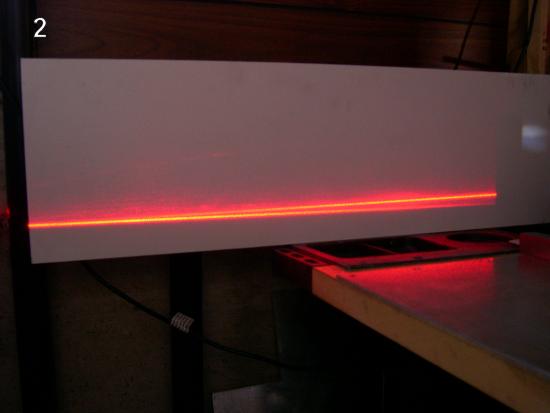
Laser line not parallel to the surface...
When properly aligned, it should look like this:
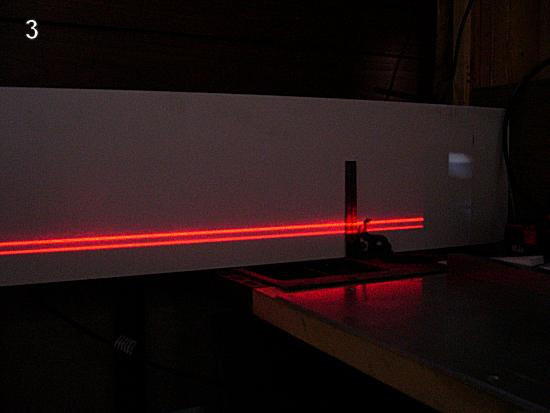
Proper parallelism achieved...
The other adjustment besides parallelism is angle of incidence. You want the angle such that the laser sweeps the entire surface to be measured.
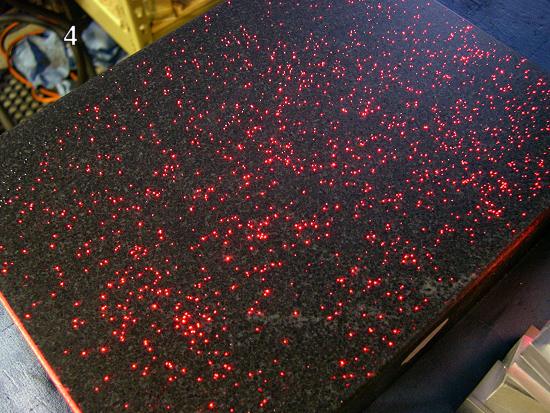
Salt sprinkled on the table will show whether the whole surface is illuminated...
The bottom line is projected directly on the screen and represents a reference as it is a portion of the top edge of the projected light from the laser that overshoots the test object. The top line on the screen is the portion that is reflected from the test surface. Because of the extremely low angle of incidence the entire test surface is illuminated and the entire surface contributes to the reflected image that composes the top line. This is obtained by careful adjustment of the height and angle of incidence of the laser.
The angle of incidence is adjusted so that the beam sweeps the entire surface of the test object. When it is correct the separation between the top and the bottom lines on the screen will be about equal to the thickness of the original laser line multiplied by the ratio of the distance of the laser to the center of the object and the distance from there to the screen. In this setup it is about 5 to 1.
Because of this a multiplication of any errors of slope is obtained. In this setup it amounts to about 240 times. This is arrived at from the ratio of the width of the laser line, about .1 inch, compared to the length of the area it illuminates, about 12 inches. This gives a factor of about 120 but is doubled because the angle of reflection is opposite and equal to the angle of incidence. That gives 240. The amount of multiplication will vary depending on the angle of incidence. If the angle of incidence is kept the same for other test objects the multiplication will remain the same. The lower the angle of incidence the greater the multiplication. The angle of incidence must of course be greater than zero.
The amount of error in slope on a surface depends on what distance that error covers. A concavity of .001" over ten inches produces much less error in slope (about 1/10) than the same .001" over a distance of one inch.
| Interpreting Flatness Results |
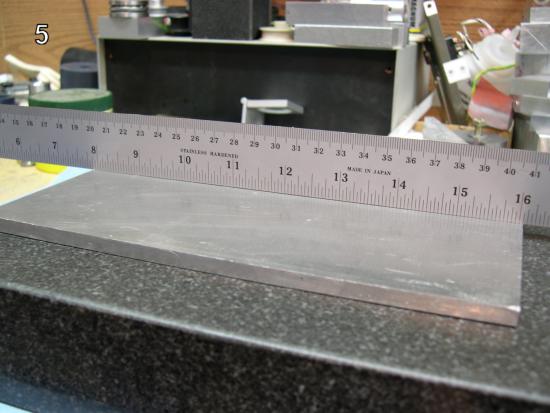
A plate with a small concavity in the center...
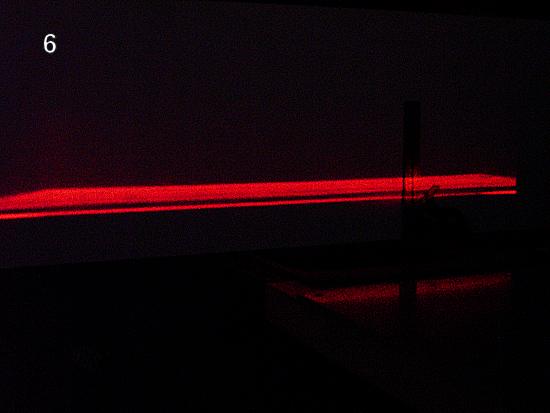
The resulting concavity is magnified by the laser...
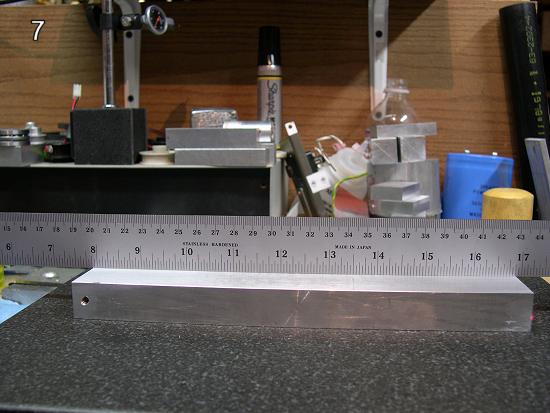
This tooling plate ought to be flat...
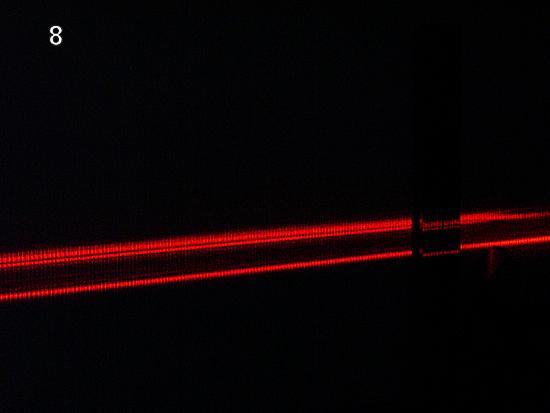
But it's off by about 0.0004" in the center...
| How It Works |
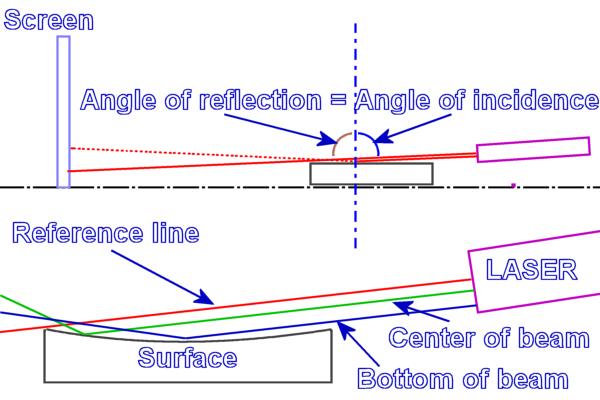
The distance of the projection magnifies errors in the surface...
| What About Parallelism With the Bottom Surface? |
If both surfaces are measured flat by this method, we can use a micrometer or other setup to ensure that the thickness is uniform and be satisfied with parallelism. In the end, if we're building a machine table or some such, one can rely on shims to get things well positioned. In this case, mylar from "space blankets" is an excellent precision shimming material being about 0.0005" thick, dimensionally stable, conformal, and it does not absorb much water.
| More Laser Metrology Links and Thoughts... |
Demonstrations with a Position-Sensitive Detector: You can measure the deflection in a laser beam as a sound wave passes through it in air!
2-D Optical Position Sensor: The PSD is the key device for fancy laser measurements. This page tells how to build a simple circuit that harnesses the power of one to measure to 0.0001" with a laser.
Aculux: These guys will sell you the finished 2-D PSD described above. Pretty slick. Not cheap at $750, but very cheap compared to "real" laser measuring devices used to align CNC machines.
Pin Laser: Another (more expensive) company that sells laser metrology tools built around a Position Sensitive Device.
|
Do you want to be a better CNC'er in 37 Seconds? Get Better Tool Life, Surface Finish, and Material Removal Rates Fast. It's that easy. You can install and get results now.
|
||||||||||||||||||
| ||||||||||||||||||