CNCCookbook: Be a Better CNC'er

THREE WAYS TO SHARE

Beginner's Step-By-Step Guide to
Making CNC Parts

So you want to make CNC Parts but don't know what all is involved? You've come to the right place--we can help!

A good place for CNC Beginners to start is to understand all the steps that go into making a part using CNC, from design through the finished part. This interactive Infographic will take you through each step, and allows drill-down into the steps for greater understanding and detail. In addition to describing each step, we will also list valuable tips and resources--other CNCCookbook articles that provide more information on the subject.

Resources:

- About the making of this guide.


1

Deliverable: Create an Idealized CAD Model of the Part

Design the part in the CAD software based on sketches, photos, specifications, and any other ideas we have for the part. The part is "Idealized" because we haven't done any serious homework yet to evaluate how easy it will be to manufacture the part. Experienced Designers will have avoided many manufacturing problems at this stage while Beginners will discover they need to change quite a bit to make the part easy to manufacture.


2

Deliverable: Finished CAD Model + Setup Sheet Outline that is a plan for how to manufacture the part

80% of the cost to manufacture a product is determined at Design Time...

In this step, we will evaluate how easy it is to manufacture our part, change the design as desired to make it easier to manufacture, and arrive at a plan for how to manufacture the part which we'll capture in our Setup Sheet Outline.


3

Deliverable: G-Code Part Program + Finished Setup Sheet

Using MeshCAM to create a G-Code Part Program...

Armed with a CAD model and our Setup Sheet Outline, we're ready to dive into CAM, Conversational Programming, Hand Coding, or whatever method we want to use to create a G-Code Part Program.


4

Deliverable: Desk Checked G-Code Program and Setup Sheet

G-Code Simulator

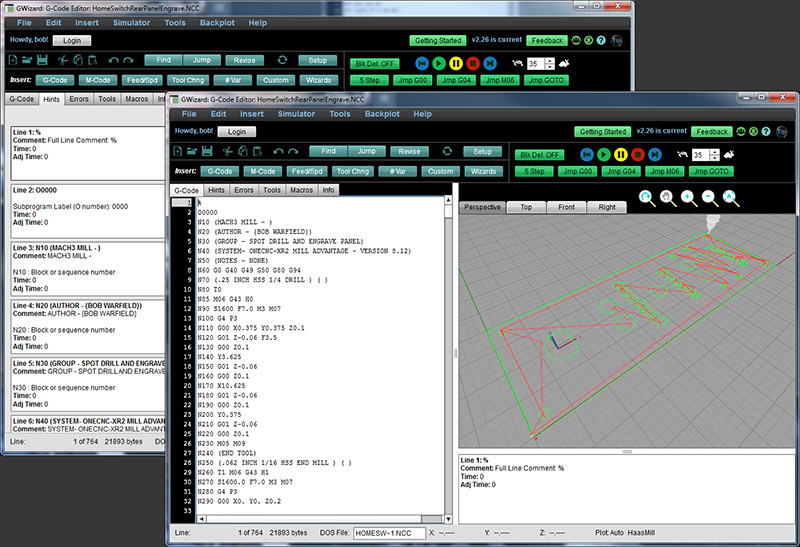
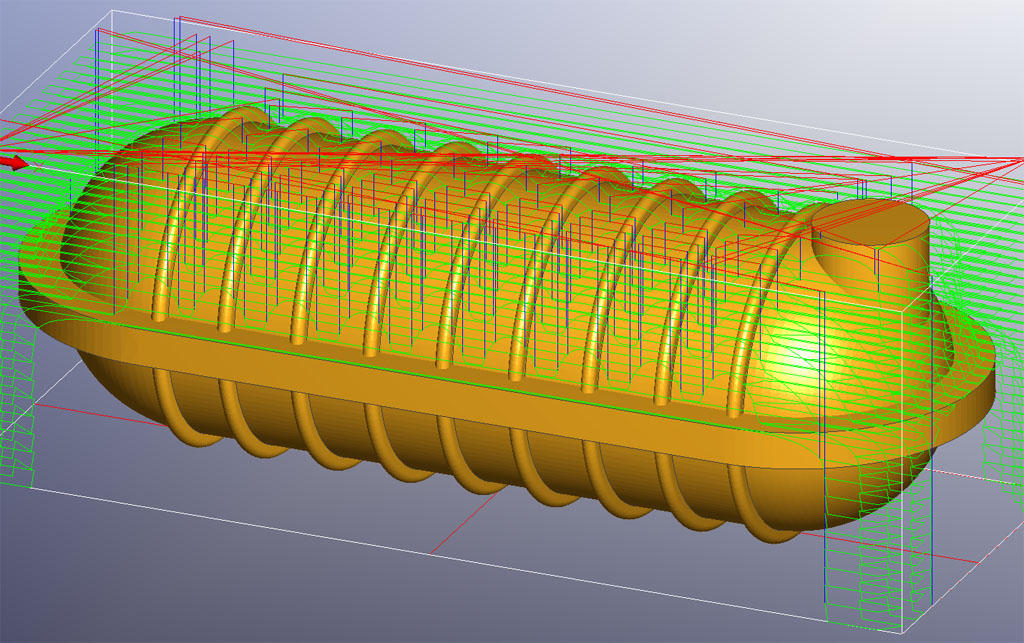
G-Code simulation can save us valuable time and trouble. Ideally, we won't need to proof programs on the machine, but reaching that level requires considerable experience, discipline, and powerful software tools. For most, simulation is a way to find many, but not all problems and a Program Proofing step will still be required.

Why is Simulation optional?

We can determine if the G-Code Program can be safely run entirely by "cutting air" at the machine. However, the more that can be discovered with a software simulator, the easier Proofing the program will be, and the less time we'll waste at the machine. For production shops, keeping the spindles turning as much as possible means more profits, so Simulation can save money. For most any CNC'er, Simulation will save time and frustration because it's faster and easier to run simulation software and fix any problems while you're sitting right at your CADCAM workstation than to deal with it at the machine and potentially have to go back and forth.


5

Deliverable: CNC Machine is Setup to Run the Part

Haimer 3D Taster Sensor

Setup is where we get the CNC Machines all ready to run the part. We need to make sure it has all the right tools in the tool changer, the right gcode program loaded, and in general that the machine is ready to go.


6

Deliverable: Program is Proven, Ready to Run the Part

Proofing the program is the last step before we actually make real cuts. The goal of proofing is to verify the program is correct and the CNC machine is setup correctly so that there will be no problems when the g-code is run for the first time.


7

Deliverable: CNC'd Parts

After all the preparation, we're finally ready to make some chips and machine a CNC part.


8

Deliverable: Inspected Parts, Ready for Finishing

Having finished the CNC machining, it's time for Quality Control. We'll inspect the parts to make sure they meet the desired specifications, tolerances, and surface finishes.


9

Deliverable: Part is Finished!

Our last step involves finishing the parts. It's optional, as our parts may not require it. But, there are many forms of finishing possible ranging from paint, to anodizing, to bead blasting, and more.


All material © 2010-2016, CNCCookbook, Inc.