|
Do you want to be a better CNC'er in 37 Seconds? Get Better Tool Life, Surface Finish, and Material Removal Rates Fast. It's that easy. You can install and get results now. |
Milling Machine Home
I bought a lathe first, and it's a nice one that taught me a lot about machinery and metalworking. However, I must say that the mill comports better with the way my mind works. The lathe is a subtle, elegant machine, that can be persuaded to do amazing things if only you can think how. The mill seems brute force and obvious. As a computer person, and particularly one versed in computer graphics, a mill literally renders in 3D using an x, y, and z axis. The computer does the same for graphics in 2D using only x and y. The lathe cheats using rotating motion. It's like polar coordinates and trig versus reading a map. But I digress and begin to sound more like a computer geek (which I am) and less like a machinist.
As I mention, the lathe is a subtler, more elegant approach. I am firmly convinced that a cheap lathe will perform better than a cheap mill. The physics just favor the lathe more in terms of rigidity and the application of power and leverage.
| The Mill: Industrial Hobbies--An RF-45 or "ZAY" Style Asian Mill |

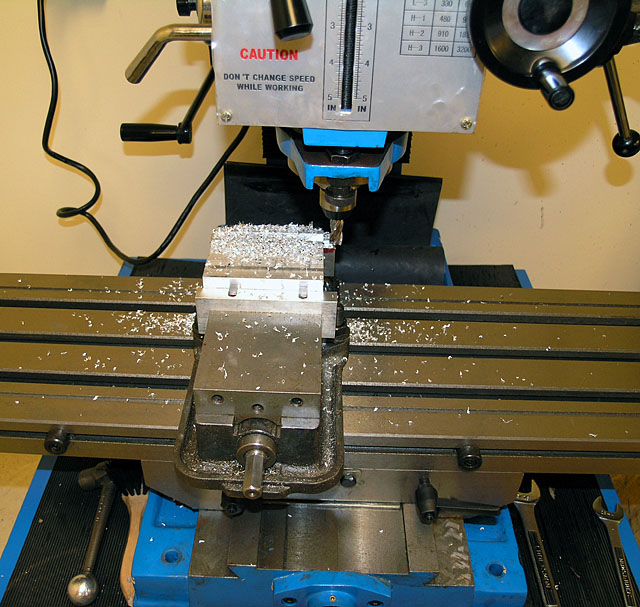
My IH Mill on the stand I built for it, right after cutting first chips...
Given my well known feelings about refurbishing American tools versus buying new Asian, it should come as no suprise that I have purchased an Asian mill. The choice of which mill bears talking about. There were two broad categories that I considered, and two that I rejected out of hand. I rejected the round column "mill/drills". I felt the latter involved too many compromises and that I would outgrow one way too quickly. They are not as rigid, and you can't raise and lower on that round column without knocking your precision out the window, which really limits their CNC possibilities. I also discarded the really small mills like the Taig or the X3 sold by my friends at Lathemaster because I wanted something with more capacity.
The two categories I considered were full featured square column mills (which is what I wound up with) and the knee mills, which are Bridgeport clones. The latter were very tempting, but I was ultimately concerned about how well one would fit into my shop. My ceiling is only 82 inches high, and everything going into the shop has to fit through a door that is only about 2/3's standard height, goes down an 18" step, and then makes a sharp right turn. Manuevering 1600 to 2000 pounds of Bridgeport clone through that knothole seemed too difficult. Among the square column mills, I like the bigger version sold by Lathemaster as well as a similar one offered by Penn Tools. The last thing that swayed me to take action was that Industrial Hobbies put on a fantastic sale on the mill with a major price break as well as free shipping.
The mill showed up at the local freight terminal almost the day after I had ordered it, which surprised me. I had a mad scramble to find someone who could help transport a 1000lb crate to my house and offload it inside. There it sat for several months until I was able to build a decent stand for the 900lb mill before moving it into the workshop and firing it up. Thank you Cabrillo College welding program for introducing me to the essential skill of welding, and thank you eBay for offering up a cherry Miller Tig welder for about half what a new machine would've cost!
Mill dimensions:
Bottom of base (no stand) to top of motor at maximum height: 58"
Bottom of base to top of table: 9"
I've been very pleased with my Industrial Hobbies mill. From time to time I read of folks who had some sort of issue with their IH Mill, but mine has been great from the get go. Unfortunately, Aaron Moss, the owner, decided to get out of the business due to fears of competition from the Chinese building cheaper CNC mills. I'm still quite happy with my mill, but there will be no more IH mills available. Fortunately, they're just ZAY-class mills similar to all of the other square column mills, so I am counting on being able to swap in parts from the other mills.
Newsflash: I got the word at the end of 2006 that Industrial Hobbies is going out of business. It's a pity, because Aaron was offering a great mill and CNC kit. I purchased the CNC conversion kit and will eventually switch my mill over. I'm not too worried about spares and so forth. The ZAY-type mills are very common, although they each differ slightly in their design. I guess Lathemaster's big mills are about as close to the IH as you can get any more.
Apparently Aaron sold the business to a new owner, so we'll have to see what sort of things he does with the mill and where he takes the business.
| Cutting My First Mill Chips |
They say you never forget the first time (no, I don't mean THAT first time!), so I thought I'd capture the moment. After powering up the mill for the first time, I trammed the head with my Indicol indicator holder, a 0.001" Mitutoyo dial test indicator, and a 1-2-3 block. I wasn't too particular, settling for being with 2 or 3 thousandths, as I was eager to try the mill out. Next I clamped my Kurt 4" milling vise (got a 6" too, but the 4" is cute and much lighter!) to the table. To get the vise square I again took a shortcut. Somewhere I read about the nifty trick of putting an endmill against the back of the vise jaw, finger tightening the vise clamp at that end, and then cranking the table to let the mill "push" the vise into square. It worked pretty good! Finally time for the moment of truth.
I selected a 1/2" Niagara 4-flute endmill, and a piece of 1/2" thick 6061 aluminum I had laying around. Spindle speed was set to 400 rpm. I didn't bother to check whether that was an appropriate speed or not, especially since this machine is all manual feeds so I've no idea of the feed rate! I locked all of the gibs except for the X-axis for maximum rigidity.
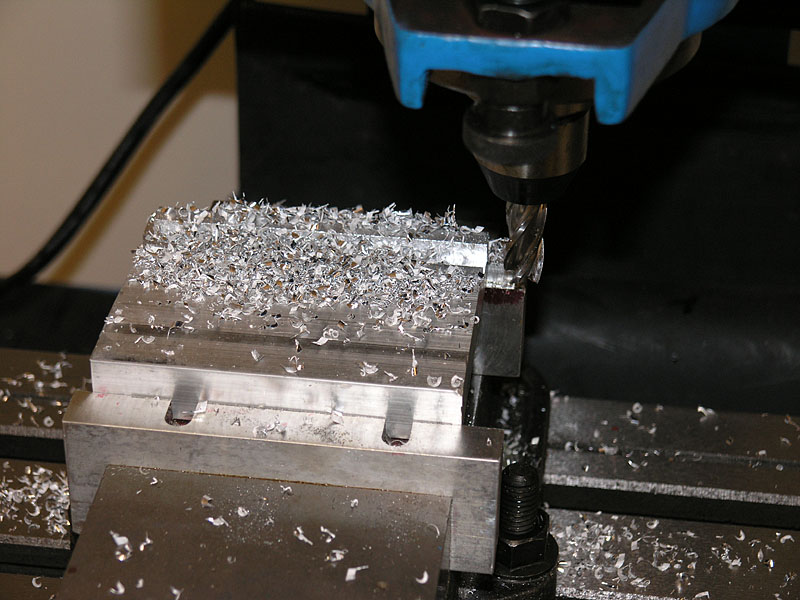
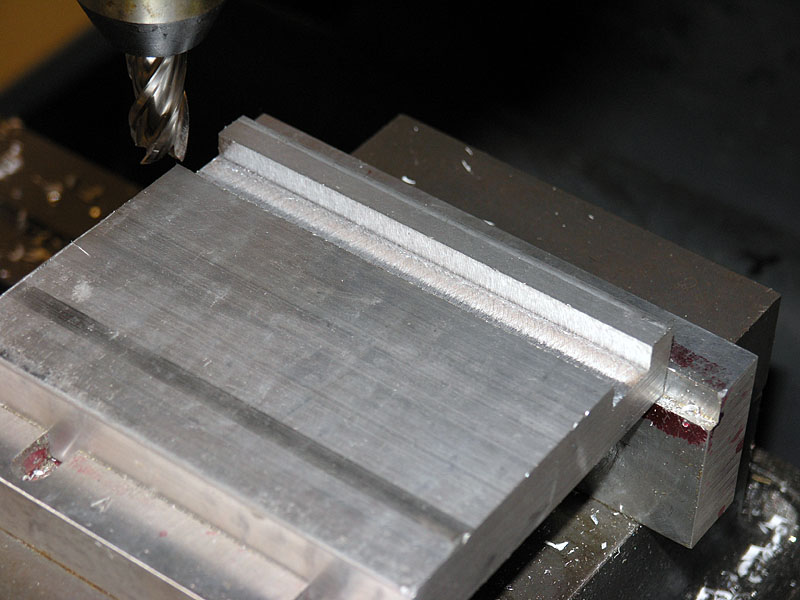
I stuck the aluminum in the vise, touched off the mill, and started experimenting with depth of cut. Compared to my Lathemaster lathe, cutting with this mill is amazingly smooth and quiet, which I took as a good sign! It shrugs off tiny depths of cut with ease. I got up to 0.010" in the aluminum before it started to even be a little less smooth. It certainly wasn't chattering, but the surface finish had deteriorated. I think part of that was also due to the fact that I just let the chips pile up, so it was cutting the same chips again too. Lastly, they say cutting a slot will not have as good a finish if the slot is exactly the width of the endmill. In any event, here are a few photos of the results:

First Pile O' Chips!

A little closer...

Sans chips you can see the finish is a bit rough...
I was curious to see how much better the finish could be with this end mill, so I cranked the Y-axis slightly so I would be cutting just the far wall and making a slightly wider slot. Given where the wall was and the direction I was going, this was conventional not climb milling, so the finish is supposedly better if I had gone the other direction and climb milled. Here is the result, with a much nicer surface finish:

Shallow cut on wall to yield a better surface finish...
The shallower cut, being clean of chips, and just cutting the one wall really cleaned up the slot tremendously. Overall, I am very pleased with this mill and looking forward to "getting to know it" for a few months before I start converting it over to CNC operation.
| Mill Tooling |
The tooling for mills involves some overlap with the lathe (more and more I'm learning), but there are a number of things uniquely "mill" as well. I have quite a bit more tooling, but wanted to give a list for beginners to start from.
Basic Tooling and Must Haves:
- I'll assume you have the basic measuring goodies like a set of digital calipers.
- Indicol indicator holder (buy the real thing on Enco, or a clone from someone like Shars) and Test Indicator (Interapid make the best!). You will need these together with a mallet to tram your mill head, which should be your first step. Avoid coaxial indicators. The Indicol is your first best choice. The coax is a handy shortcut for rough work, but no substitute.
- 1-2-3 Blocks: useful when tramming, and for many other things.
- Clamping set to fit your mill's T-slots.
- Kurt Vise or clone. Get a used Kurt on eBay ($180-200) or buy a clone. I hear LittleMachineShop's is nice. I recommend 4" for the smaller mills. A 6" is huge.
- Mill Holders. Buy a set. A lot of folks "standardize" on 3/8" and 1/2" shank end mills. You may want an extra or two in those sizes.
- End Mills. Get some 3/8" and 1/2" end mills, both 2 flute and 4 flute. Try some American-made--you'll be amazed at what a difference it makes.
You can now make some chips. Work at getting your mill trammed and the vise on the table true. Practice some cuts. You next steps will be a function of what you want to build. I'll break it into a couple of tiers.
Got to have pretty quickly tooling:
- Drill bits and a chuck. Get a keyless chuck from Lathemaster. They're fabulous and inexpensive.
- Fly cutter. Leaves a fine finish and good for squaring large surface areas. You'll need a tool to go into the fly cutter as well. Lots of folks use brazed carbide lathe tools in these.
- Collets and chuck. You will need to decide what system you want. I highly recommend going with one of the ER series. Each collet in an ER can clamp on a wider range of diameters than other collet systems. They just work better than older systems like R8 or 5C.
- More cutters. Depends what you are building. You probably want a fly cutter pretty quickly. They leave a fine finish and can be used to square large areas. Lots of specialized cutters too. I have a set of Keo zero flute deburring bits that are fantastic.
- V-Blocks. Essential to cutting round things.
- Soft jaws for vise. I only use my Kurt's with aluminum jaws. You can make them pretty easily, and it's a decent early project to try. Or, you can buy them from a variety of sources.
- Parallels. Gotta have 'em pretty soon! You stand your work on them in the vise to get it sitting up high and square.
More Esoteric: Base this stuff on the needs of a particular project you are building. A lot of it is very cool, but you'll spend a fortune here, so wait until you need it.
- Rotary tables. Very handy. Don't go too big for your mill and make sure you get one that sits both vertically and horizontally.
- Angle blocks and Kant-Twist clamps: Because you never have enough ways to clamp things!
- Angle related tooling: Precision angle blocks and 60 degree tilting V-block, just to name a couple. Sometimes these little goodies are way faster than dragging out the rotary table and setting it up. Sine bars, which will require a gage block set, and tilting tables are a little more investment for angles.
- Finishing cutters: Corner rounding, deburring, and so on.
- Fancy hole drilling: Reamers, counterbores, spade drills, oh my!
Obviously, one could go on and on. You may also want to experiment with indexable tooling. Try an inexpensive TPG-insert face mill. You might like it better than fly cutting.
| Mill Cutting Tools and Surface Finish |
Quite a lot of information about surface finish, cutters, and feeds and speeds.
| Mill Tips and Techniques |
More notes from the Internet so I won't forget.
| Rotary Table Accessories and Tips |
The rotary table need not be exclusively devoted to the mill, but in general practice, they usually are. Visit my page on rotary tables to learn more about these intriguing devices.
| CNC Conversion |
CNC Conversion is my ultimate ambition for the mill. It looks to be relatively easy in this day and age to convert the acme screws to ballscrews (thus reducing backlash and friction yielding much better accuracy), create brackets to mount servers or steppers, and interface said motors to the PC. That's all readily obvious reading the articles on the net. What is less clear is how smoothly things go on the software side. There is talk of Windows not playing well with CNC. It is not, after all, a real time operating system, and periodically will make the machines wait when they don't want to, the same way it does us humans. Opinions vary on how successfully one can get around these issues, and it's really hard to get a flavor for what it's like to actually use these homebrew CNC rigs day to day. I sympathize with the many novices who want to know how to build one while retaining the use of handwheels. In any event, being a hardcore computer geek, I feel I can handle the computer piece far better than the machining, so we'll work through it.
Just to be sure, I started my CNC efforts with a lathe conversion, thinking that would be easier. After all, they say you learn machining starting with a lathe? While the lathe is a conversion from scratch, I have purchased Industrial Hobbies excellent "mechanicals only" CNC conversion kit for the mill. It includes the ballscrews and motor drives. I will furnish the motors and electronics. The kit was on sale at a considerable savings, and having it should save me a tremendous amount of effort and time.
| Mill Accuracy |
I've made a few measurements so far to try to understand how accurate my mill is:
Out of the Box: Trammed,
but not Squared (i.e. column has not been shimmed) |
|||
Test |
Method of Testing |
IH Mill Results |
Comparable Mill Specifications |
| Quill Runout | Used an Interapid B1 DTI and 1-2-3 block to measure the deflection as I ran the quill up and down. | Maximum of 0.0075" over the full travel. Most of the travel was under 0.005". There seems to be a final deflection near the end of travel that is large. | Tormach has no quill. Wilton Bridgeport clone spec for this is 0.000984", which is quite a bit better than the IH turned in. |
| Z-Axis Deflection | Used an Interapid B1 DTI and 1-2-3 block to measure how accurately the Z-axis tracked vertically as I cranked it up and down. | Maximum of 0.00075" over half the z-axis travel. The needle on the DTI was barely budging, so it is possibly even less. | Tormach spec is 0.001378" / 5.9". IH Mill got about half the Tormach spec, which is considerably better. Wilton Bridgeport clone spec for this is 0.002362", which IH outperforming considerably. |
| Quill Backlash | Used my Z-Axis DRO. Cranked a specified amount on the handwheel (1 full turn), zeroed the DRO, and then cranked exactly the same distance in reverse. The second crank would include the backlash, since we changed direction. The difference between the DRO indication and the amount a full turn should have produced is the backlash. | Value ranged from 0.004" to 0.014". The difference is backlash in the clutch for the handle bars. | There is no quill on the Tormach, but with ballscrews, the Tormach mill achieves 0.001575" on z-axis backlash (they call it "reverse idle stroke"). |
| X-Axis Backlash | Used my X-Axis DRO. Cranked a specified amount on the handwheel (1 full turn), zeroed the DRO, and then cranked exactly the same distance in reverse. The second crank would include the backlash, since we changed direction. The difference between the DRO indication and the amount a full turn should have produced is the backlash. | X-axis backlash looks right at 0.010". | With ballscrews, the Tormach mill achieves 0.001181" on x-axis backlash (they call it "reverse idle stroke"). |
| Spindle runout | With a DTI on the inside of the R8 taper turn the spindle and see how far the needle swings around 0. | I get 0.0005" or slightly less. |
Tormach doesn't show this on their inspection report. Instead, they use a test bar and indicate 0.000787" at the top of the test bar. I would expect these two are about the same. For comparison, the inspection sheet of the ultra-accurate Mori Seiki lathe calls for spindle nose runout of 0.000394". Many modern CNC's claim under a tenth when new. |
|
Do you want to be a better CNC'er in 37 Seconds? Get Better Tool Life, Surface Finish, and Material Removal Rates Fast. It's that easy. You can install and get results now.
|
||||||||||||||||||
| ||||||||||||||||||