GW Editor User Guide
|
||||||||
|
G-Wizard Conversational CNC: Getting Started
Welcome to G-Wizard Conversational CNC! This page is designed to help you get started as quickly as possible using it. We'll assume you're all registered, installed, and wondering what the heck you need to do next.
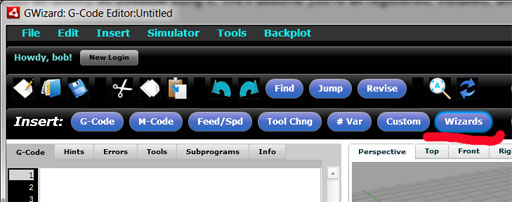
Milling Wizards Accessing the Milling Wizards To access the Milling Wizards, press the "Wizards" button on the GW Editor Tool Bar:
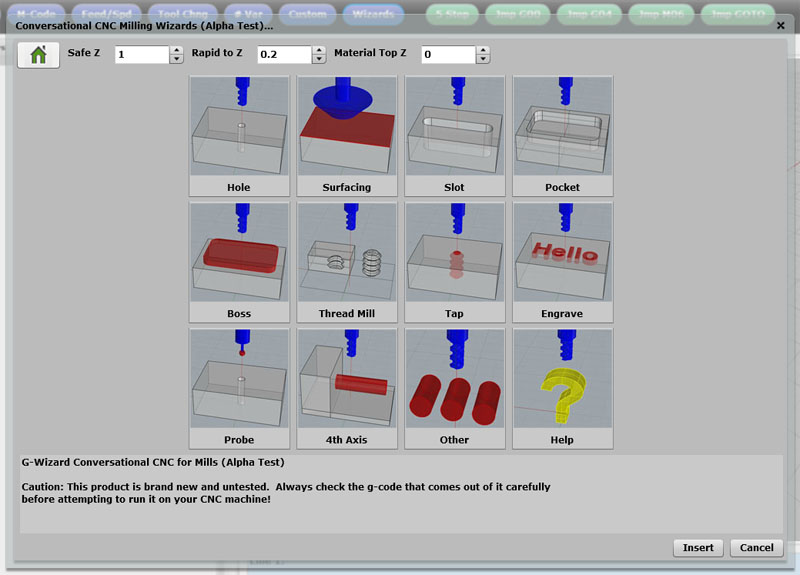
Press the "Wizards" button to select a Conversational CNC Wizard... The set of Wizards that appear will be based on whether your machine is a mill or lathe, which is determined by the Machine Profile you have in use. Here is what the home screen for the Milling Wizards looks like:
The Milling Wizards Home Screen... There's a home button and some Z values at the top that are common to all the Wizards. You can press the Home Button to get back to the Milling Wizard Home Screen any time. You can close the milling wizards by clicking the close box ("X") at the window top right or by selecting the "Insert" or "Cancel" buttons at the bottom. Insert will add g-code correspond to the Wizard functions you've selected at your current cursor position in your program. The Z values along the top are similar to what CAM programs use and have the following purpose:
To use a Milling Wizard, simply click the graphical icon for the operation you want.
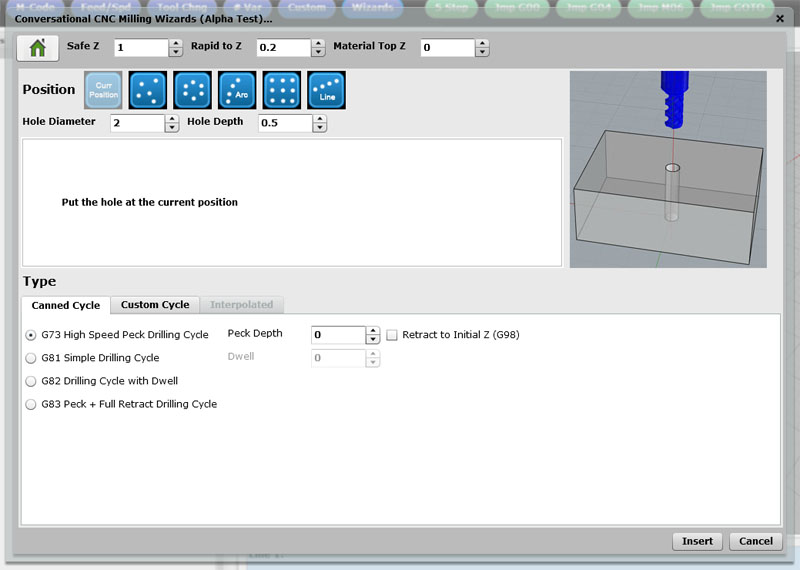
Hole Wizard The Hole Wizard is for drilling holes with twist drills and for interpolated holes made with an endmill. It looks like this when it first comes up:
Conversational CNC Hole Wizard... To use the Hole Wizard, you must specify two sets of information:
The hole position mode is selected with the row of graphical icons at the top. The options include:
After you've indicated how the hole positions will be determined, it's time to specify how the holes will be drilled. There are three methods that can be used:
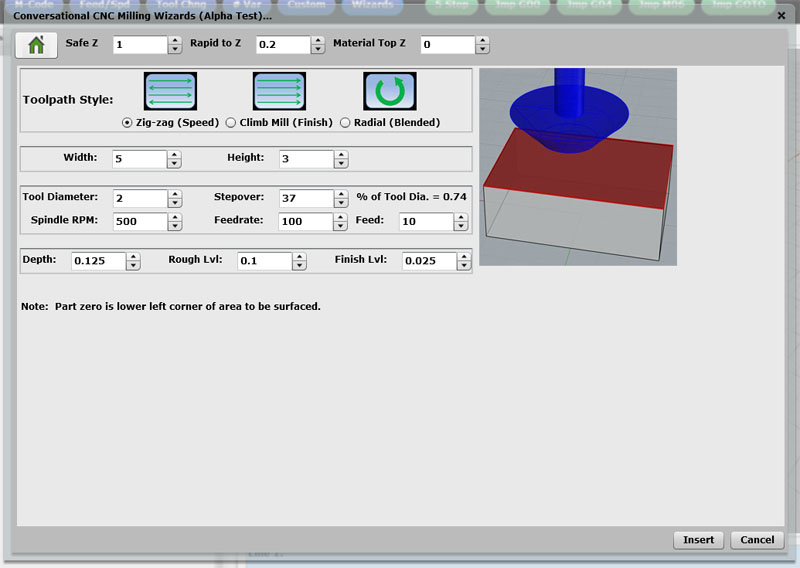
Surfacing Wizard The Surfacing Wizard is used to mill an area to clean it up and make it flat, typically with a facemill, though you may also use a fly cutter or regular endmill. Here is what the Surfacing Wizard looks like:
Conversational CNC Surfacing Wizard... The Surfacing Wizard offers three toolpath styles: - Zig-zag: Fastest surfacing, because it cuts both ways. - Climb Mill: Best surface finish–passes are climb mill and then rapid back so they always cut in the same direction. - Radial: This path spirals outward, and is a nice compromise between the two as well as a good choice for surfacing round areas. We’ve spent a lot of time incorporating state-of-the-art face milling toolpath features, such as the way the tool arcs into the workpiece. These features result in longer tool life, particularly when surfacing tough materials, as well as better surface finishes. You can get a PhD in Face Milling and write your own programs to do this stuff or just use the Surfacing Wizard. While there are other Wizards and Conversational CNC programs out there, G-Wizard is the first one I’ve seen that does this sort of thing--even many CAM packages don’t. Here is a video that shows how to use the Surfacing Wizard:
Slot Wizard
Turning Wizards [ Coming Soon! ]
|
||||||||
|
|
|
|
|
|
|
||
|
|
|
|||||||


